Booting into Hekate on Nintendo Switch (Unpatched 2017 Models)
Overview
This guide explains the boot chain for early 2017 Nintendo Switch units (unpatched, vulnerable to Fusee-Gelee). It covers how the console is forced into a user-controlled bootloader environment instead of the stock Horizon OS (HOS).
The short version: We’re exploiting a hardware-level vulnerability in the Tegra X1 bootROM to inject Hekate as the primary bootloader. This lets you chainload custom firmware (Atmosphère), manage NAND/emuMMC, run backups, boot Android/Linux, and more — all while keeping the original system intact if you use proper isolation.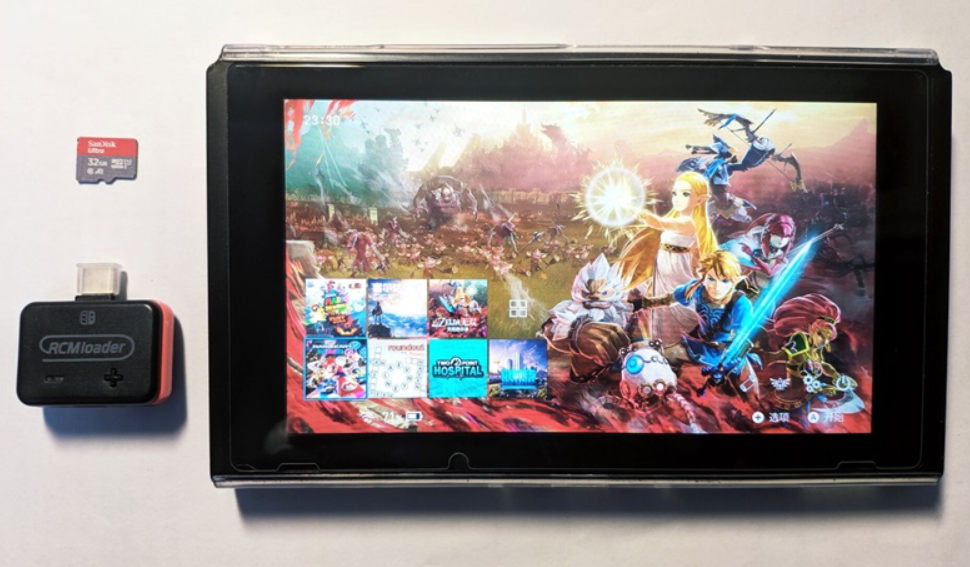
Key Terms
Unpatched Switch (2017 models)
Only early units with serials in specific ranges are vulnerable to Fusee-Gelee (a permanent bootROM exploit). Later models (2018+, Mariko chip: V2, Lite, OLED) are hardware-patched and require a modchip. No software update or NAND restore can fix the vulnerability — it’s in silicon.
RCM (Recovery Mode)
NVIDIA’s factory recovery mode on the Tegra X1. When triggered, the console halts boot before loading any OS and waits for a signed payload over USB. This is the entry point for all softmods on unpatched units.
RCM Jig
A simple shorting tool (often a metal clip or 3D-printed piece) that bridges pin 10 on the right Joy-Con rail to ground. This tricks the console into entering RCM on power-on.
Payload Injector / RCM Loader
Hardware dongle (e.g., small USB device with blue LED) that stores and sends the Hekate payload (hekate_ctcaer_x.x.x.bin) over USB when the console is in RCM. Without one, you need a PC/phone running TegraRcmGUI, Rekado, etc., every boot.
Hekate
- A full-featured, GUI-based bootloader (comparable to GRUB on PC). It handles:
- Chainloading CFW (Atmosphère via fusee or package3)
- eMMC/emuMMC backup & restore
- emuMMC creation/migration/repair
- SD partitioning for multi-OS setups
- USB mass storage (UMS) mode for SD/eMMC
- Hardware info readout
- Auto-boot configuration
Atmosphère (CFW)
The de-facto custom firmware layer. It patches Horizon OS on-the-fly rather than replacing it. Enables homebrew, sysmodules, overlays, emuMMC booting, etc.
Tesla Overlay
A modular overlay framework (accessed via key combo in-game or menu). Allows real-time system tweaks, monitoring, and plugin loading without replacing the UI.
Verifying Compatibility
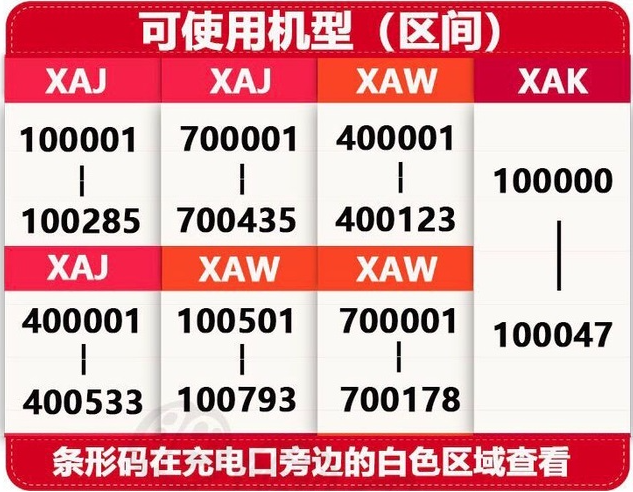
Only unpatched (V1) Switches support this method. Check your serial number (System Settings → System, or on the bottom sticker)
If your unit is patched, this guide does not apply — look into modchip solutions instead.
- Use a checker like https://ismyswitchpatched.com/
- Safe ranges (unpatched): XAW1xxxxxx–XAW7xxxxxx, etc.
- “Possibly patched” ranges require testing with a jig.
- Anything XKWxxxxxx, XKJxxxxxx, or later is patched (Mariko).
![]()
Step-by-Step Boot Process (Unpatched V1 Only)
- Format your microSD card to FAT32 (use a tool like guiformat or Rufus if needed; 128GB+ recommended for emuMMC).
- Copy the full Atmosphère package (e.g., latest stable release + sigpatches) to the SD root. Typical structure includes /atmosphere/, /bootloader/, /switch/, etc. Ensure Hekate files are present in /bootloader/.
- Insert the SD card into the Switch. Remove the right Joy-Con.
- Power on normally (briefly) to ensure it reaches the lock screen or menu, then power off completely.
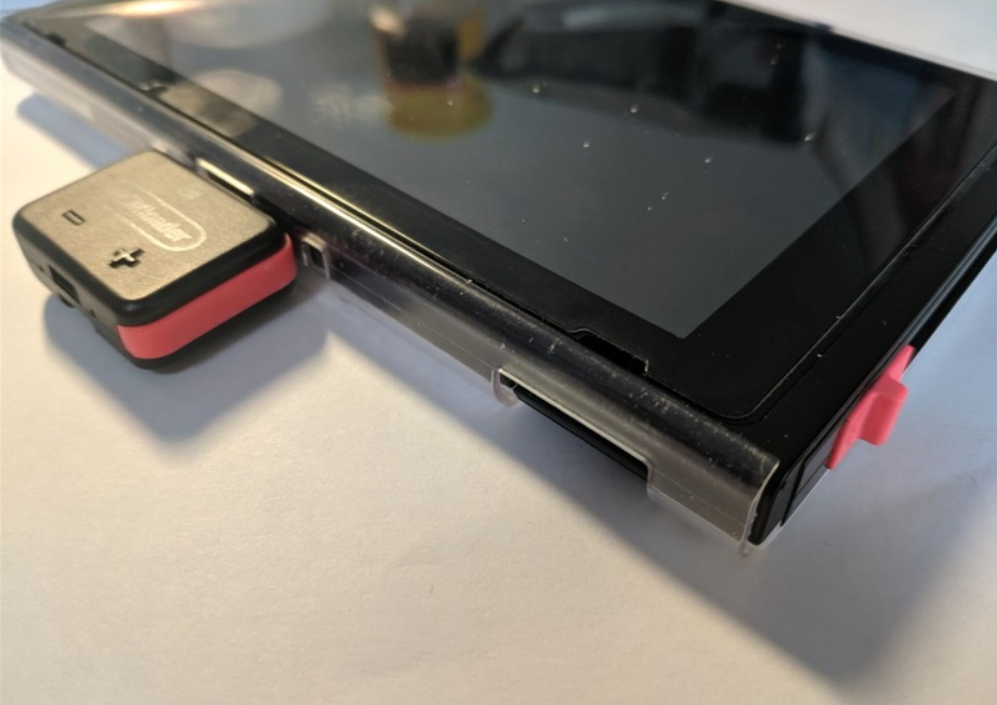
- Insert the RCM jig into the right Joy-Con rail.
- Connect your payload injector / RCM loader (or USB cable to PC/phone). The LED should turn blue/indicate successful injection when Hekate loads.
- Power off fully (hold POWER button).
- Hold VOL+ and tap POWER once. The console enters RCM → Hekate boots.
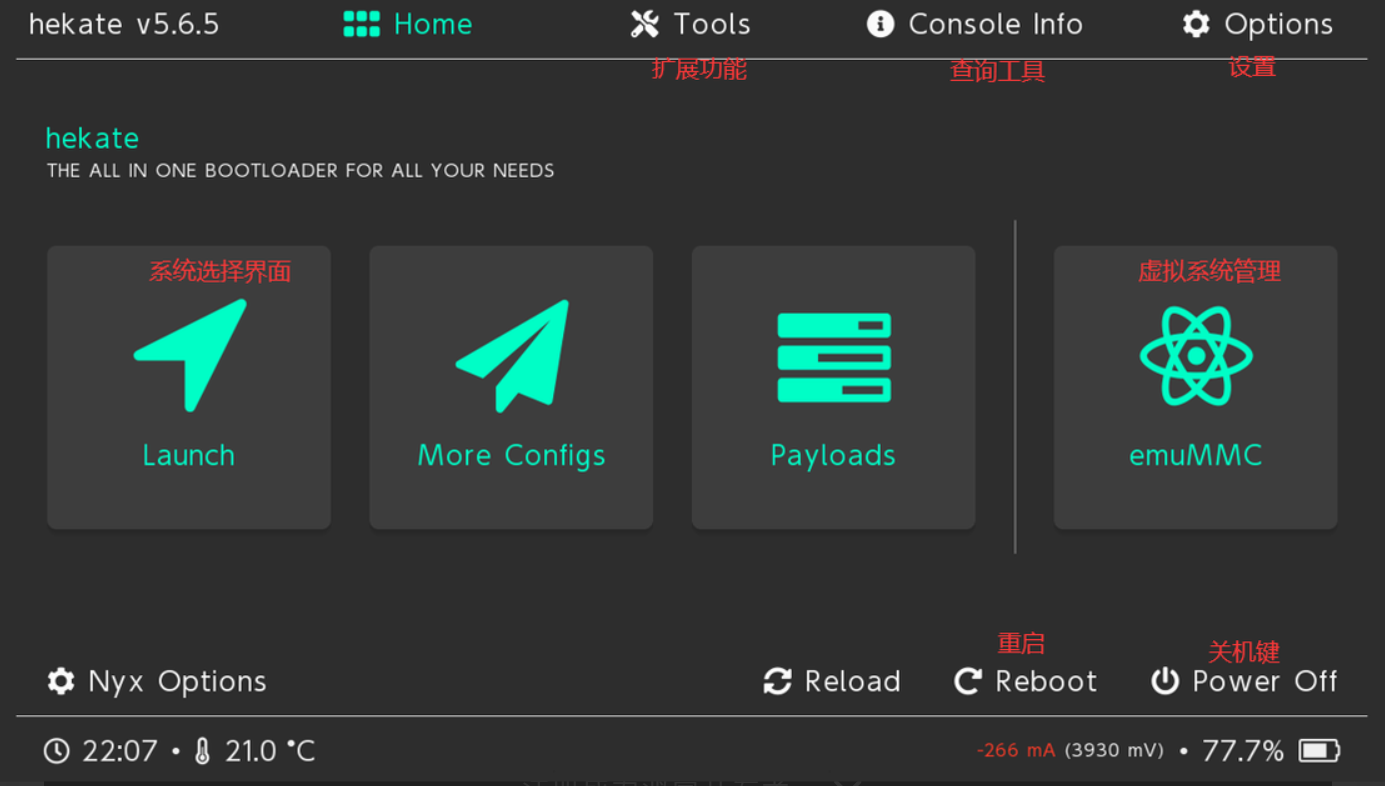
You should now see the Hekate splash, then the Nyx GUI menu.
Hekate Nyx GUI Breakdown
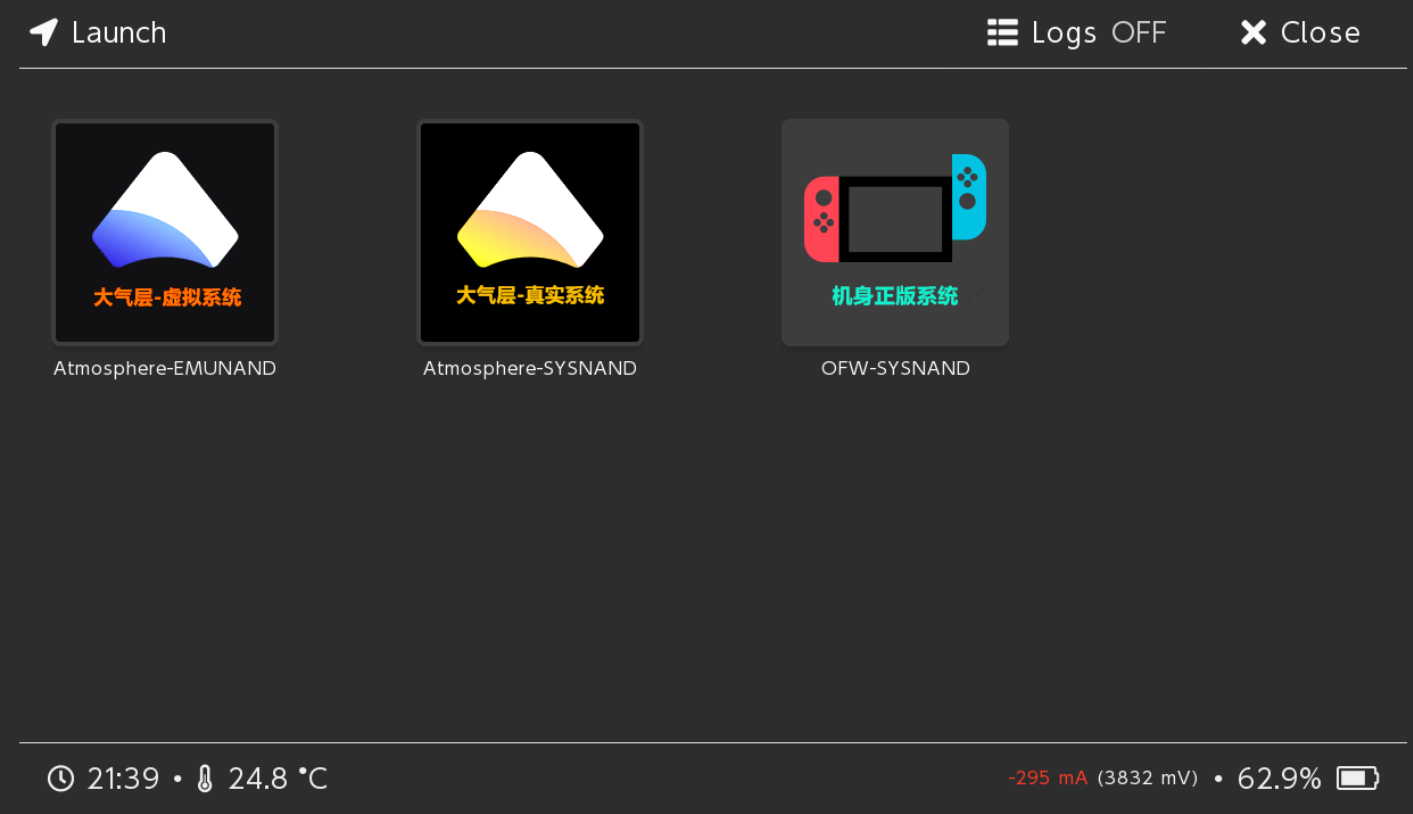
Home / Launch
- Main screen with boot entries (e.g., CFW (emuMMC), CFW (sysNAND), Stock, Android/Linux if configured). Select to boot.
![]()
![]()
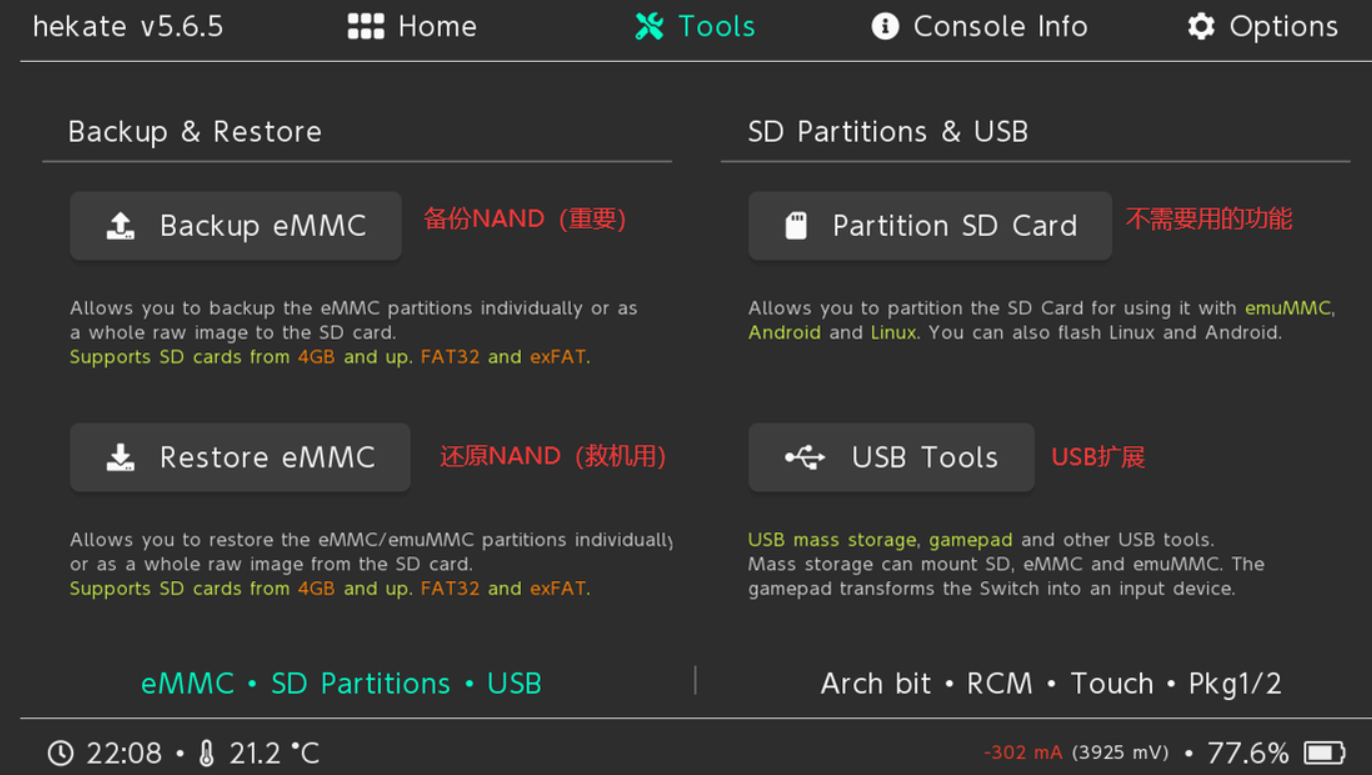
Tools
- Backup/Restore eMMC or emuMMC (BOOT0/BOOT1/GPP partitions — always do full backups first).
- Partition SD Card (for multi-boot setups).
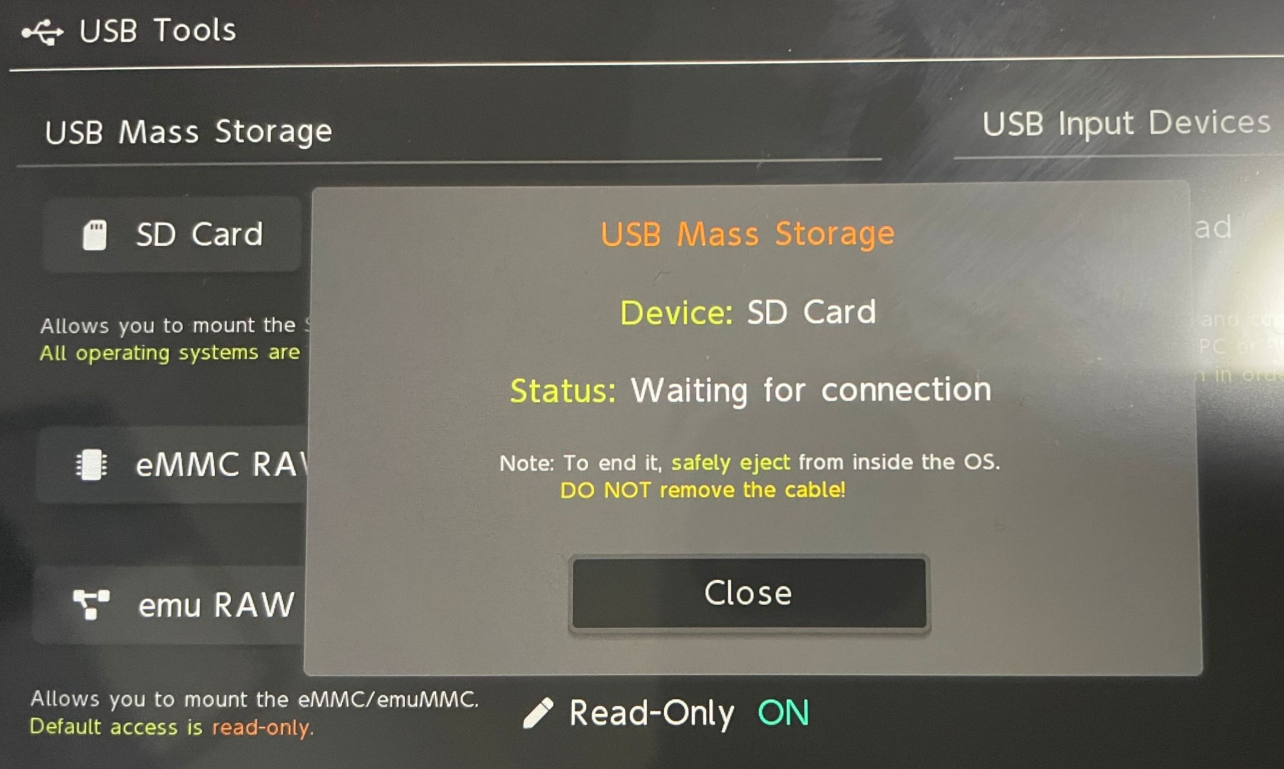
- USB Mass Storage: Mount SD/eMMC/emuMMC as a drive on PC (eject properly via “Close” before unplugging).
- USB Gamepad mode.
- Archive bit fixer, touch calibration, benchmarks, AutoRCM toggle (avoid on patched units).
![]()
![]()

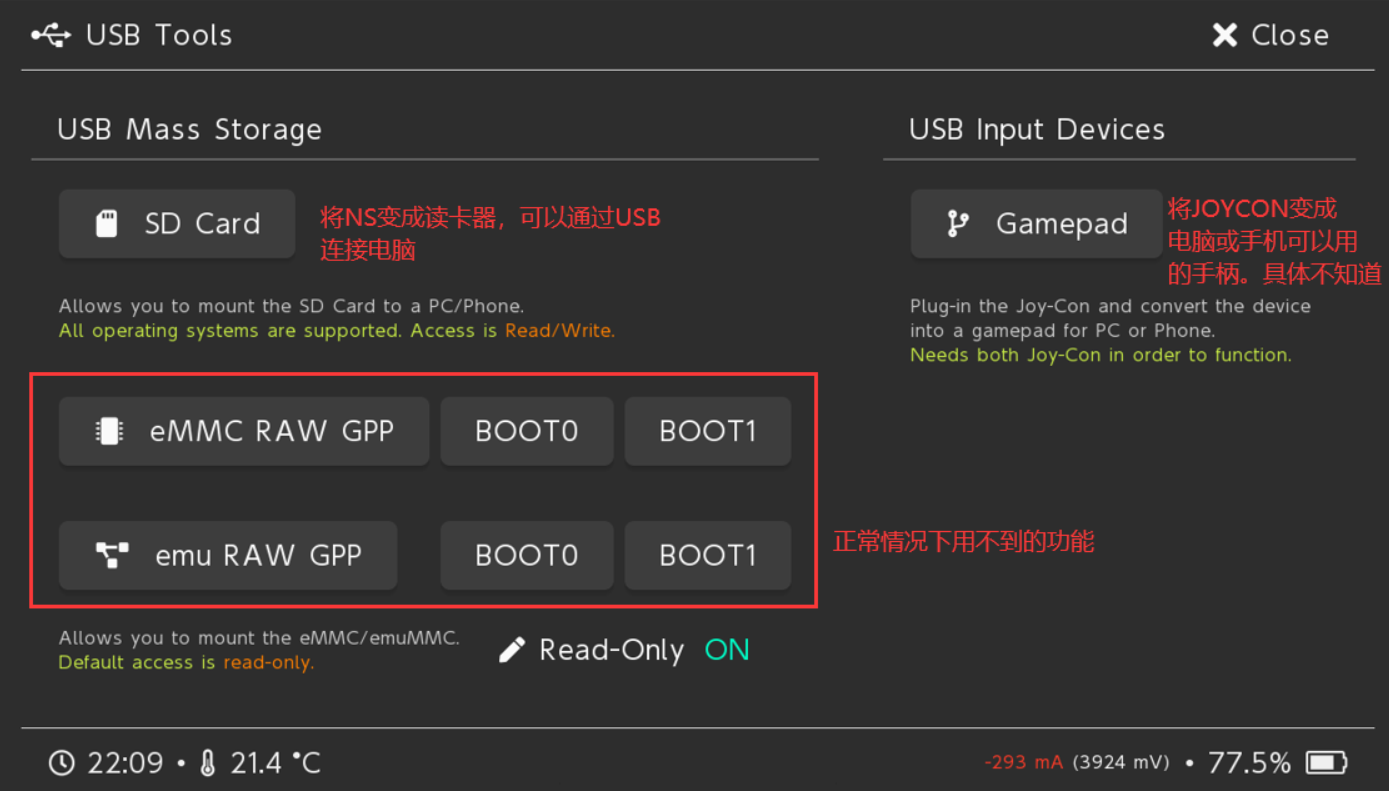
USB Tools
- Dedicated section for UMS modes (SD, eMMC raw partitions) and gamepad emulation.
![]()
![]()
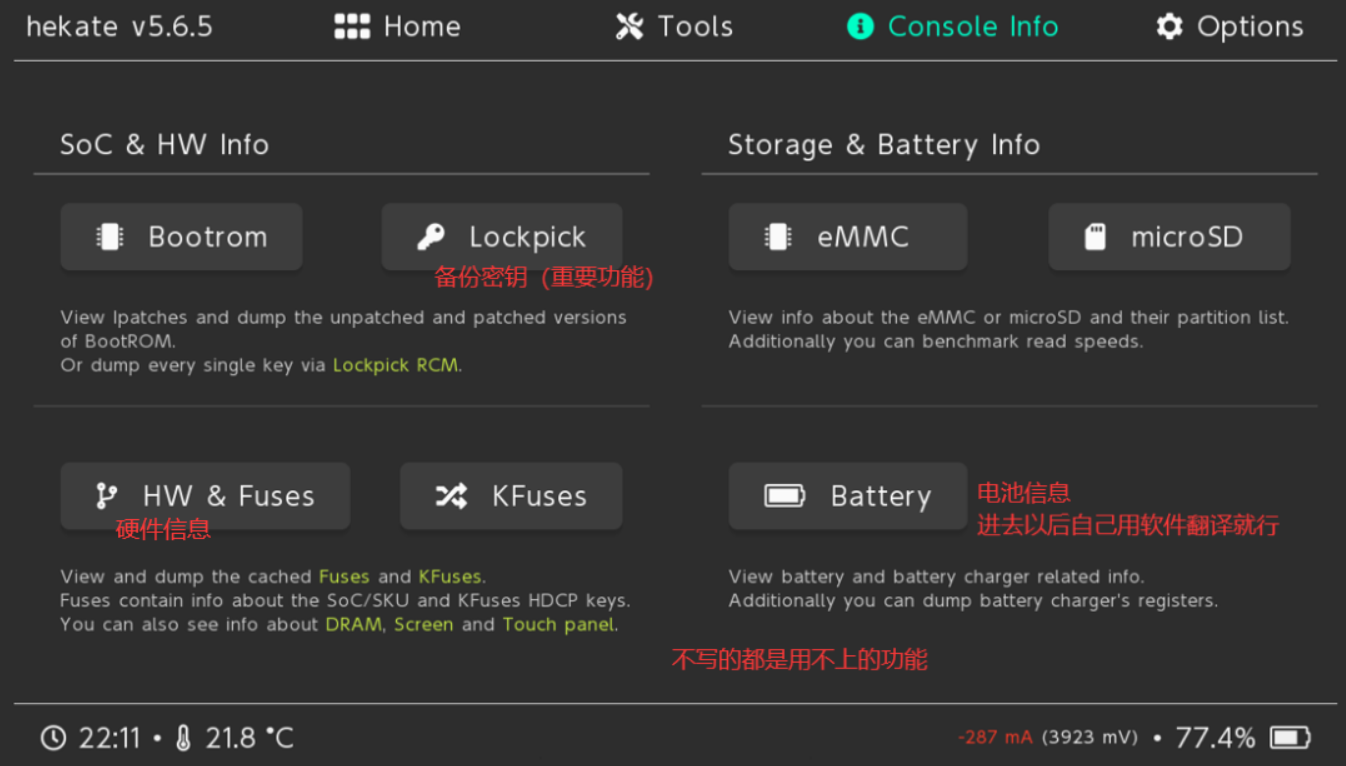
Console Info
- Detailed readout: SoC revision, fuse status, RAM config, display/touch, eMMC/SD health, battery/PSU/charger stats.
![]()
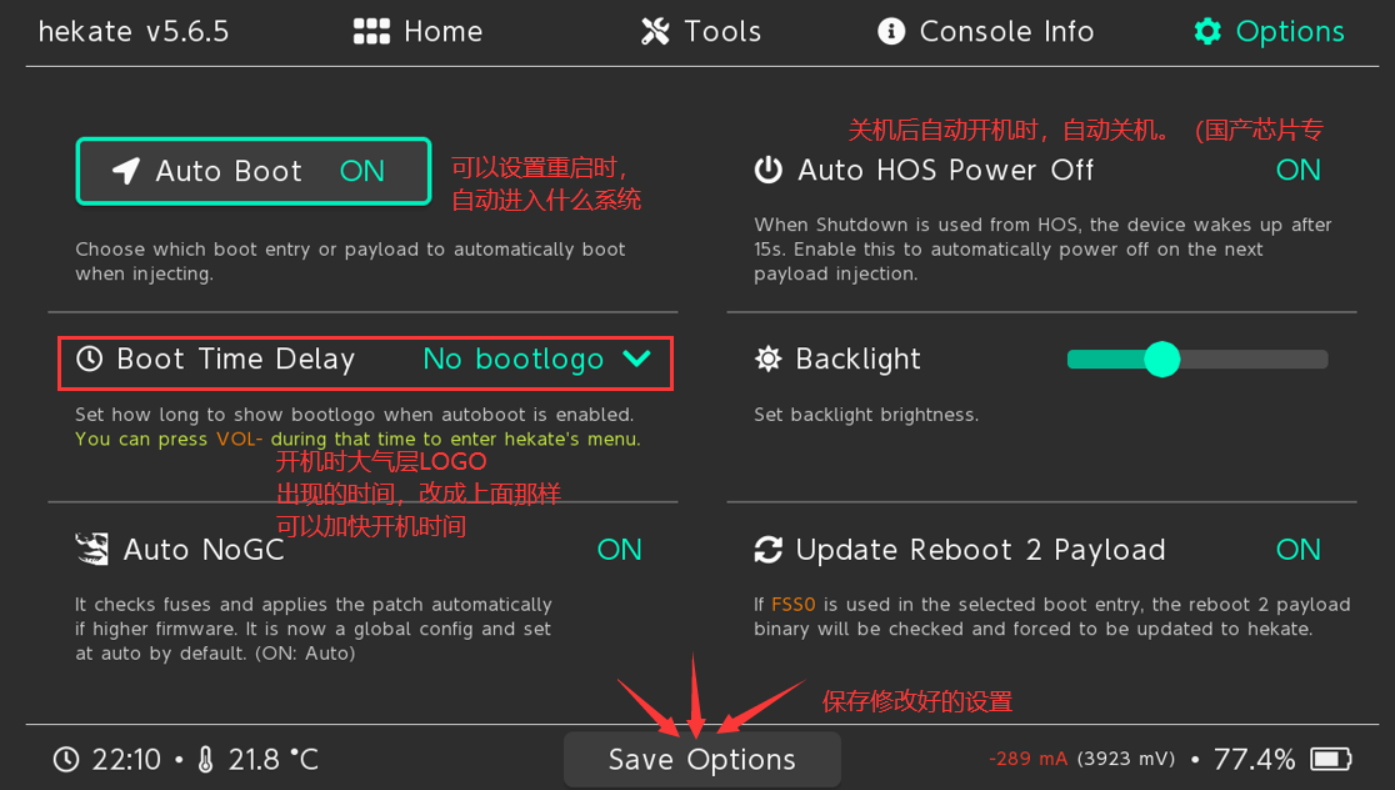
Options
- Set autoboot entry (e.g., emuMMC CFW) and boot delay (bootwait in seconds).
- Backlight level, themes (via nyx.ini).
- Boot protection, auto-patching flags (NoGC, etc.).
- Recommended: Enable autoboot to emuMMC with 3–5s delay for quick normal boots while still allowing VOL- interrupt to enter menu.
![]()
What This Actually Achieves
- Boot control — Hekate intercepts boot before Horizon loads, giving you root-level choice over what runs.
- Isolation via emuMMC — Keep a clean sysNAND for online/stock use; run CFW/plugins only in emulated NAND on SD. Minimizes ban risk if you block Nintendo servers properly (exosphere, DNS-MITM, 90DNS).
- Hardware freedom — Turns the Switch into a general-purpose ARM device capable of running Linux, Android, bare-metal tools, etc.
This isn’t about piracy — it’s about owning the boot process and exploring what the hardware can really do.
References
- Hekate GitHub
- Atmosphère GitHub
- Detailed introduction to Hekate interface
- NH Switch Guide (authoritative)
- Fusee-Gelee explanation (Chinese)
- Console Hacking Glossary
- Switch jailbreak history
- Tesla - The Nintendo Switch Overlay Menu
- Tesla-Menu
- Tesla overview
Always verify downloads from official repos. Keep backups current. Test in emuMMC first.