Deploying 1Panel on Raspberry Pi 4B
Overview
Running a management panel on a Raspberry Pi feels a bit like adding a cockpit to a tiny spaceship.
Although 1Panel was originally designed for x86 servers, it now provides an ARM64 build, which works perfectly with the architecture of the Raspberry Pi 4B.
That means you can run it directly on your Pi and turn the device into a small, self-hosted server with a clean web management interface.
Requirements
Hardware Requirements
- Raspberry Pi 4B (2GB RAM or more recommended)
- MicroSD card (at least 16GB, Class 10 recommended)
- Power adapter
- Ethernet or Wi-Fi connection
Install Raspberry Pi OS
Please refer to the following guide:
Update the System
Connect to your Raspberry Pi via SSH and run:
1 | sudo apt update && sudo apt upgrade -y |
Install Docker
1Panel depends on Docker, so Docker must be installed first.
1 | sudo apt install curl -y |
Reboot the system:sudo reboot
Installing 1Panel
Once the system is ready, you can install 1Panel using the official script.
The script automatically detects the system architecture and downloads the correct version.
If your system is 64-bit Raspberry Pi OS, it will install the ARM64 build.
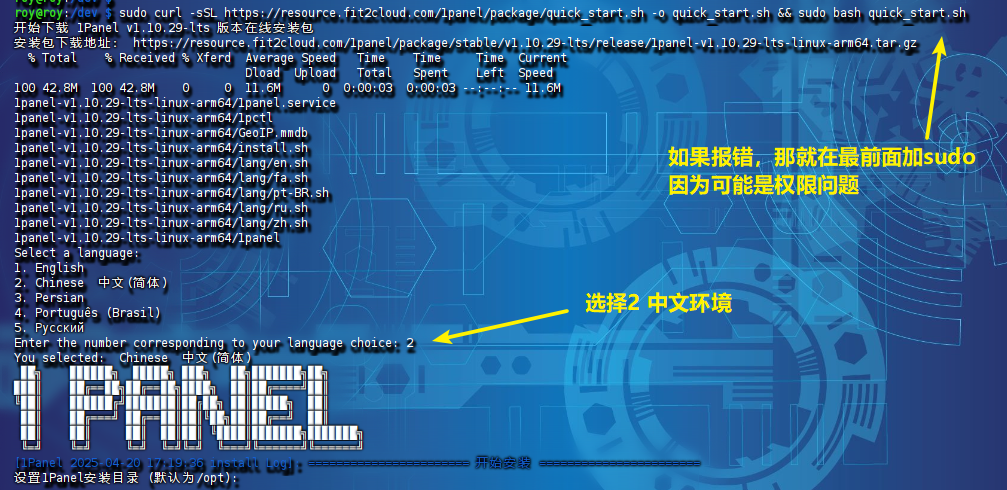
Run the Installation Script
1 | curl -sSL https://resource.fit2cloud.com/1panel/package/quick_start.sh -o quick_start.sh && sudo bash quick_start.sh |
During installation:
- The script will detect the ARM architecture automatically.
- The installation process usually takes 5–10 minutes.
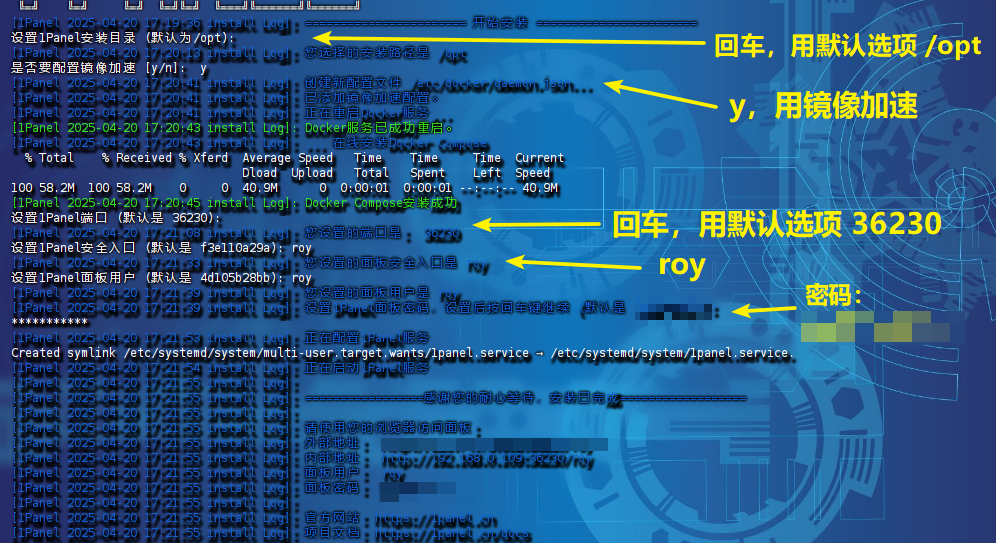
- You will be prompted to configure:
- Installation directory (default: /opt)
- Panel port (default: 36230)
- Username and password (strong password recommended)
- If Docker is not installed, the script will prompt you to install or fix it automatically.
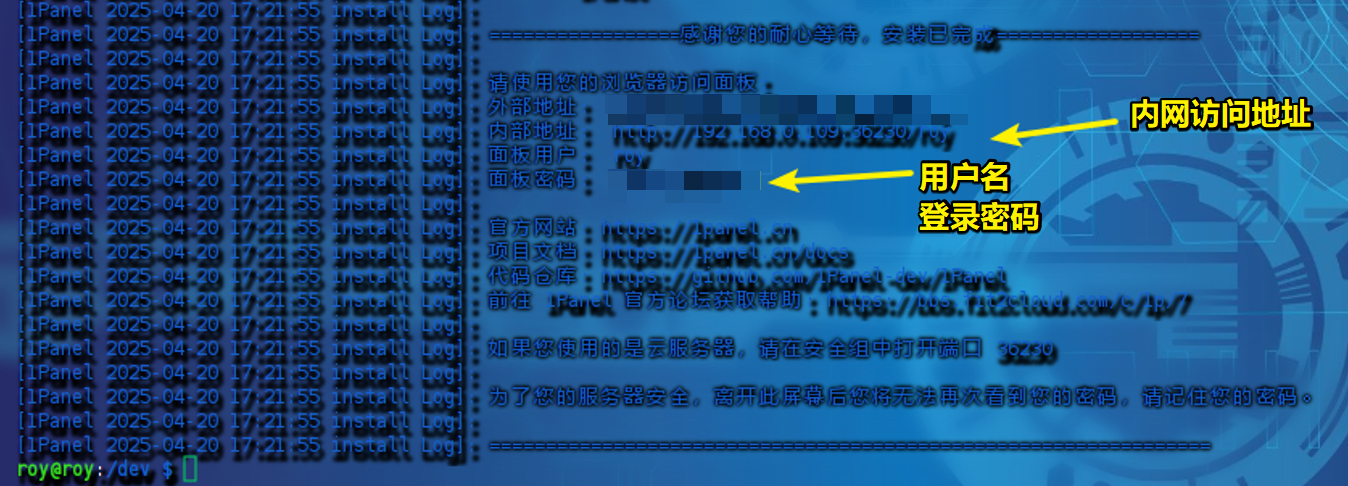
Installation Complete
After installation finishes, the terminal will display the access URL, for example:
http://<树莓派IP>:36230
Accessing 1Panel
Get the Raspberry Pi IP Address
- Run the following command:
hostname -I | awk '{print $1}'
![]()

Open the Web Panel
- In your browser, enter:
http://<RaspberryPi-IP>:PORT/RANDOM_PATH(Example http://192.168.0.109:36230/roy) - The random path is a security entry point configured during installation.
![]()
![]()


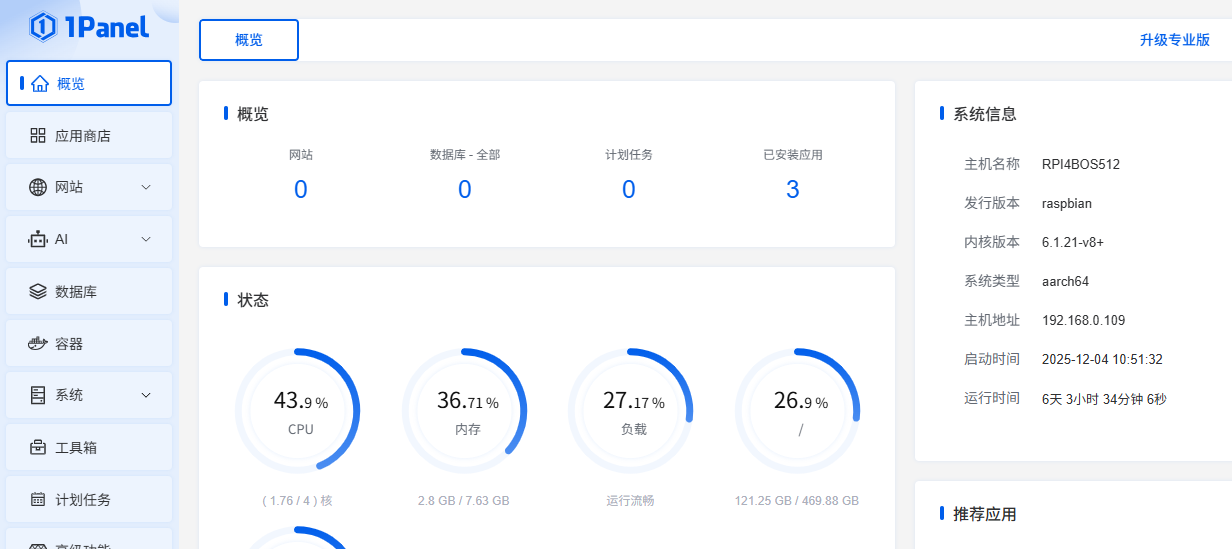
First Login
- Log in using the username and password you configured during installation.
![]()
![]()

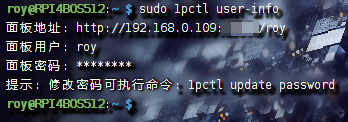
Retrieve Login Information
- If you forget your username, password, or access path, run:
1
sudo 1pctl user-info
![]()
Version Information

Troubleshooting
- ARM Compatibility
- Raspberry Pi 4B works well with 1Panel, but some applications require ARM container images.
- Running with CasaOS
- No conflict as long as different ports are used.
- CasaOS usually uses port 80, while 1Panel uses a custom port.
- Uninstall
sudo 1pctl uninstall
- Update
sudo 1pctl update- or update directly inside the panel.
- Performance
- Raspberry Pi 4B runs smoothly, but if you deploy multiple applications, monitor the temperature and consider adding a heat sink.
- Firewall
- If ufw is enabled, allow the panel port:
sudo ufw allow <PORT>
- If ufw is enabled, allow the panel port:
- Port Conflict
- If the default port is already in use, modify the configuration:
/opt/1panel/config/config.yaml - Then restart the service:
sudo systemctl restart 1panel
- If the default port is already in use, modify the configuration:
- Change Password
sudo 1pctl update password
References
- 1Panel GitHub Repository
- Official Website
- Documentation