Deploying Yddict On Raspberry Pi 4B
Overview
yddict is a lightweight CLI dictionary tool that queries Youdao Dictionary (有道词典) directly from the terminal. It’s perfect for developers who want quick English ↔ Chinese lookups without opening a browser or dealing with heavy GUI apps full of ads.
Features
- English → Chinese translation
- Chinese → English translation
- Phonetic symbols / pronunciation hints
- Web-sourced definitions and examples
- Custom proxy support
- Custom output color
- Completely ad-free
Requirements
- Node.js ≥ 12.0.0
- npm ≥ 6.0.0
yddict is pure JavaScript, so it runs fine on ARM64 like Raspberry Pi 4B — no compilation needed.
Demo

Installation Steps
Update your system
Always a good first step on fresh Raspberry Pi OS installs.
1 | sudo apt update && sudo apt upgrade -y |
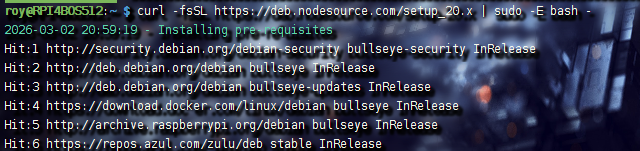
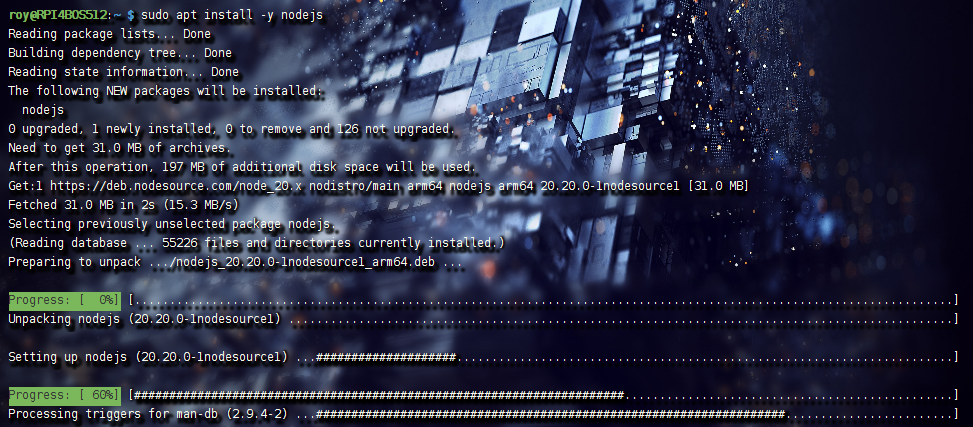
Install Node.js (LTS recommended)
The Node source repo gives you a clean, up-to-date version. Here we’re using v20.x (stable as of 2025–2026).
1 | curl -fsSL https://deb.nodesource.com/setup_20.x | sudo -E bash - |

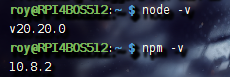
Verify versions
1 | node -v # should show v20.x.x |
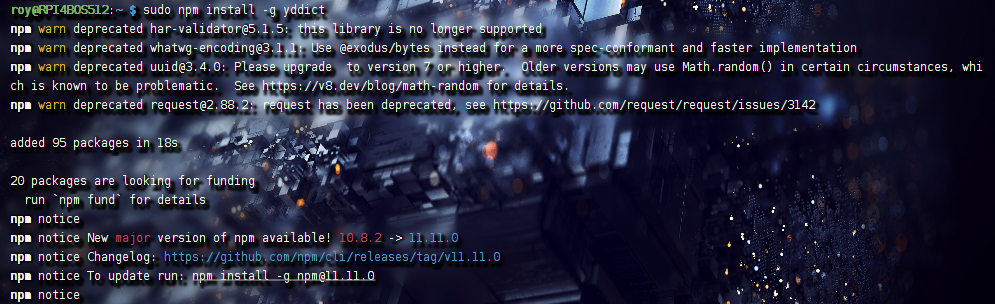
Install yddict globally
1 | sudo npm install -g yddict |
Quick check that it’s installed
1 | npm list -g --depth=0 |
You should see yddict listed under global packages.
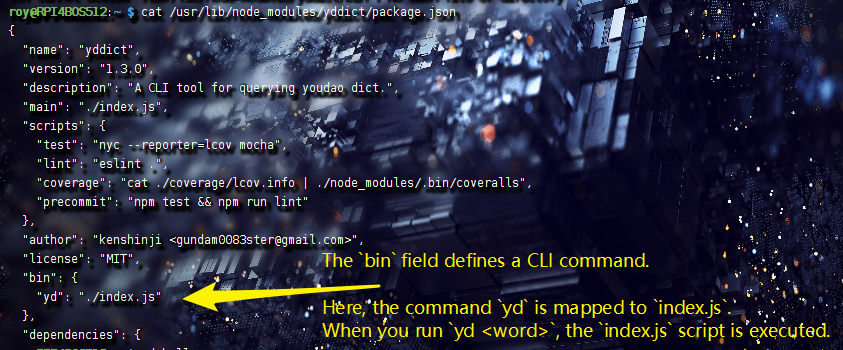
Optional: Verify Installation Paths
- Check the package metadata
1
cat /usr/lib/node_modules/yddict/package.json
Look for the
binfield — it maps theydcommand toindex.js.
- Peek at the main script (just for curiosity)
1
cat /usr/lib/node_modules/yddict/index.js
You’ll see it uses
request,chalk,cli-spinner, etc., to fetch and pretty-print results from Youdao.
1 |
|
Basic Usage
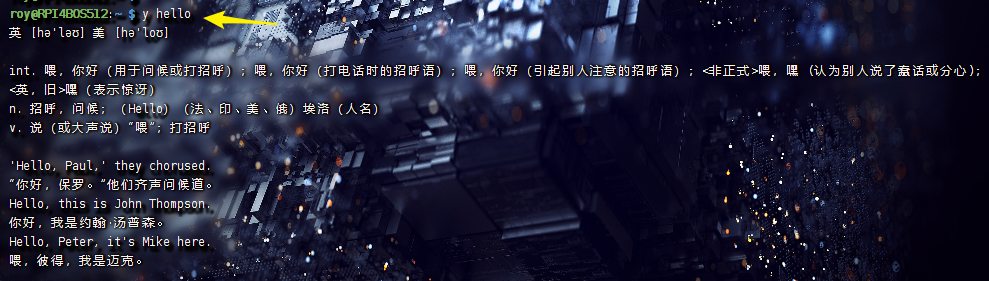
Run lookups directly in the terminal
1 | yd hello |

It handles both directions automatically (detects Chinese characters).
Convenience Tip: Shell Alias
If you prefer a shorter command:
1 | nano ~/.bashrc |
Add this line at the end:
1 | alias y='yd' |
Save, then reload:
1 | source ~/.bashrc |
Now you can just type:
1 | y hello |
Uninstall (if needed)
1 | sudo npm uninstall -g yddict |
Notes & Gotchas
- Proxy setup: If you’re behind a corporate/VPN/proxy, edit
~/.config/configstore/yddict.jsonafter first run1
2
3
4{
"proxy": "https://your-proxy:port",
"color": "yellow"
} - No releases published on GitHub, but the repo is still active (Hacktoberfest-tagged, ongoing commits). Install via npm is the official way.
- Works great on headless Pi setups — super lightweight for quick lookups while coding or reading docs.
References
- GitHub repo: yddict
- English README: yddict English README
That’s it — you now have a fast, terminal-based dictionary on your Pi. Handy when you’re knee-deep in code and need to check a word without breaking flow. Enjoy!